Once the primer is dry, you can start painting or staining the seat. Use your chosen paint or stain and apply it evenly with a paintbrush or foam brush.
If you’re using paint, apply multiple thin coats, allowing each coat to dry completely before applying the next one. This will help prevent drips and ensure a smooth finish.
If you’re staining the wood, apply the stain with a brush or cloth in the direction of the wood grain. You can apply multiple coats for a darker color, allowing each coat to dry between applications.
Add Decorative Elements (optional):
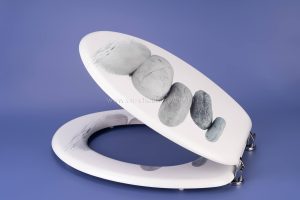
If you want to add decorative elements to your toilet seat, such as stencils, decals, or hand-painted designs, now is the time to do so. Allow any additional paint or decals to dry completely before moving on to the next step.
Seal the Surface:
Once you’re happy with the paint or stain and any decorative elements, it’s time to seal the surface to protect it from moisture and wear.
Apply a clear sealant, such as polyurethane or varnish, over the entire surface of the seat. Follow the manufacturer’s instructions for application and drying times.
Reattach Hardware and Install:
Once the sealant is dry, reattach any hinges or hardware to the toilet seat.
Install the toilet seat back onto the toilet bowl according to the manufacturer’s instructions.
Enjoy Your Custom Creation:
Once everything is dry and securely in place, your custom wood toilet seat is ready to use! Enjoy your personalized touch every time you use the bathroom.
Once the primer is dry, you can start painting or staining the seat. Use your chosen paint or stain and apply it evenly with a paintbrush or foam brush.
If you’re using paint, apply multiple thin coats, allowing each coat to dry completely before applying the next one. This will help prevent drips and ensure a smooth finish.
If you’re staining the wood, apply the stain with a brush or cloth in the direction of the wood grain. You can apply multiple coats for a darker color, allowing each coat to dry between applications.
Add Decorative Elements (optional):
If you want to add decorative elements to your toilet seat, such as stencils, decals, or hand-painted designs, now is the time to do so. Allow any additional paint or decals to dry completely before moving on to the next step.
Seal the Surface:
Once you’re happy with the paint or stain and any decorative elements, it’s time to seal the surface to protect it from moisture and wear.
Apply a clear sealant, such as polyurethane or varnish, over the entire surface of the seat. Follow the manufacturer’s instructions for application and drying times.
Reattach Hardware and Install:
Once the sealant is dry, reattach any hinges or hardware to the toilet seat.
Install the toilet seat back onto the toilet bowl according to the manufacturer’s instructions.
Enjoy Your Custom Creation:
Once everything is dry and securely in place, your custom wood toilet seat is ready to use! Enjoy your personalized touch every time you use the bathroom.
WRITE TO US
Request A Free Quote
Haveany questions about our products?
Don’t hesitate to contact us. Chuangshis Sanitary Product Specialists are very happy to help you and provide professional and reliable solutions to help you solve various problems.